The Wiki for Tale 8 is in read-only mode and is available for archival and reference purposes only. Please visit the current Tale 11 Wiki in the meantime.
If you have any issues with this Wiki, please post in #wiki-editing on Discord or contact Brad in-game.
Difference between revisions of "Ariella's Welcome Island Guide"
Jump to navigation
Jump to search
Peacefulness (talk | contribs) (fixed a typo) |
|||
| (70 intermediate revisions by 2 users not shown) | |||
| Line 1: | Line 1: | ||
| − | *If you have a Trial account, you have 24 game hours before having to buy a subscription. Trial accounts have limited privileges. To buy a subscription go to https://www.desert-nomad.com/ | + | *If you have a Trial account, you have 24 game hours before having to buy a subscription. Trial accounts have limited privileges. To buy a subscription go to https://www.desert-nomad.com/ |
==Starting Your Egyptian Journey== | ==Starting Your Egyptian Journey== | ||
| − | * You have landed on an island in the Mediterranean Sea! To give you a taste of life in Egypt your task is to learn skills and gather materials to build a ferry on this island's southern shore and launch to Egypt. | + | * You have landed on an island in the Mediterranean Sea! To give you a taste of life in Egypt your task is to learn skills and gather materials to build a ferry on this island's southern shore and launch to Egypt. |
| − | * The Welcome Banner is your starting place. | + | * The Welcome Banner is your starting place. |
[[File:Welcome_Banner.jpg|none|300px]] | [[File:Welcome_Banner.jpg|none|300px]] | ||
| − | |||
| − | |||
| − | + | * A tutorial is at the top center of your screen or click the Notice Signs along the road. | |
| + | |||
[[File:Tutorial.jpg|none|650px]] | [[File:Tutorial.jpg|none|650px]] | ||
| − | + | [[File:Notice_Sign.jpg|none|100px]] | |
| + | |||
* Click anywhere on the ground to move. | * Click anywhere on the ground to move. | ||
* Move your cursor to the left and right edge of the screen to look around. | * Move your cursor to the left and right edge of the screen to look around. | ||
* Move your cursor to the top or bottom of the screen to zoom. | * Move your cursor to the top or bottom of the screen to zoom. | ||
* Click Self > Skip this Tutorial to get rid of the tutorial window. | * Click Self > Skip this Tutorial to get rid of the tutorial window. | ||
| − | + | ||
* Click Self > Utility > Set my Time Zone. | * Click Self > Utility > Set my Time Zone. | ||
* Self > Options > Interface Options > Camera to set how fast your view moves around. | * Self > Options > Interface Options > Camera to set how fast your view moves around. | ||
* Self > OPtions > Camera to try out different camera views. F7 is the commonly used. | * Self > OPtions > Camera to try out different camera views. F7 is the commonly used. | ||
* Need to leave the game? Utility > Quit. | * Need to leave the game? Utility > Quit. | ||
| − | + | ||
* Dress yourself differently. Click Self > Appearance. | * Dress yourself differently. Click Self > Appearance. | ||
* Bring up the World Map by hitting F3. | * Bring up the World Map by hitting F3. | ||
| Line 29: | Line 29: | ||
==Doing the List== | ==Doing the List== | ||
| − | |||
| − | *Your to-do list, "Welcome to Egypt" tab on the bottom left of your screen. <br> | + | |
| + | * Your to-do list, "Welcome to Egypt" tab is on the bottom left of your screen. | ||
| + | [[File:Welcome_to_Egypt_Tab.jpg|none|400px]] | ||
| + | |||
| + | * Your shopping list: | ||
| + | [[File:Materials_List.jpg|none|500px]] | ||
| + | |||
| + | * Finding Slate. Run along a shoreline. Watch the icons in the upper left. Where you see a mud icon is where there is a chance for the slate icon to appear. | ||
| + | |||
| + | [[File:Finding_Slate.jpg|none|500px]] | ||
| + | |||
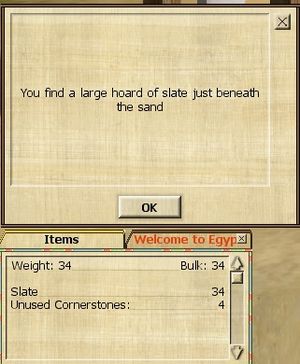
| + | *The first time you gather a material, like slate, an Items tab shows up with your current Inventory. When you have gathered 4 slate, you get a bonus of 30 slate! | ||
| + | [[File:Slate_Bonus.jpg|none|300px]] | ||
| + | |||
| + | ==Buying Skills from School of Architecture== | ||
| + | |||
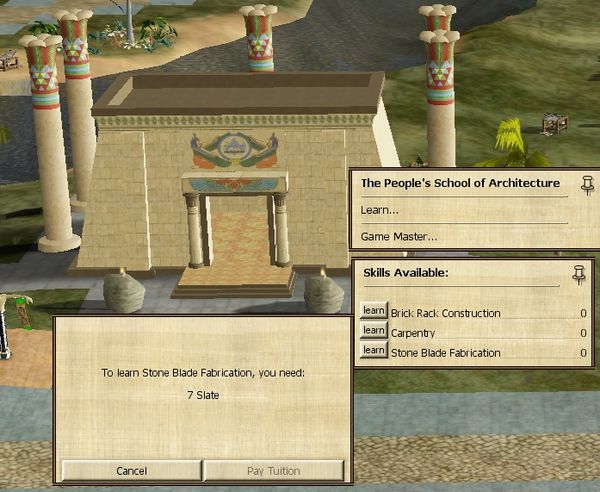
| + | * Buy Stone Blade Fabrication at a School of Architecture. Now your Skills tab shows up! | ||
| + | [[File:Stone_Blade_Fabrication.jpg|none|600px]] | ||
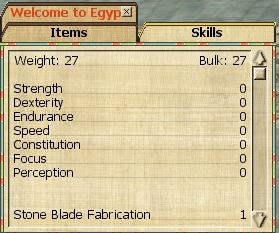
| + | [[File:Skills_Tab.jpg|none|300px]] | ||
| + | |||
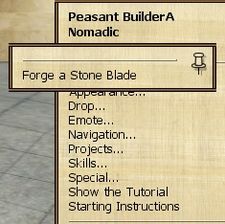
| + | *Forge a Stone Blade by clicking yourself then Skills... and pin the menu. You will need many so make more but leave 11 Slate in your Items. Look at your Skills tab to see that Stone Blade Fabrication started at Level 1 and will raise as you forge more stone blades up to a maximum of Level 7. | ||
| + | [[File:Make_a_Stone_Blade.jpg|none|225px]] | ||
| + | |||
| + | * Learn Carpentry then gather more slate. | ||
| + | [[File:Carpentry.jpg|none|500px]] | ||
| + | |||
| + | *Build a Wood Plane. You now have a Projects menu on yourself. The Build menu lets you move and rotate your machine before finishing the build. Make sure to click the Build to finish your new Wood Plane. [[File:Wood_Plane.jpg|none|500px]] | ||
| + | * Gather Wood. After you gather wood it takes a tree some time to regenerate more wood to gather. | ||
| + | [[File:Gather_Wood.jpg|none|350px]] | ||
| + | <br> | ||
| + | [[File:Wood_Regeneration.jpg|none|350px]] | ||
| + | |||
| + | * Find your Wood Plane and make some Boards. | ||
| + | [[File:Boards.jpg|none|250px]] | ||
| + | [[File:Plane_Wood.jpg|none|450px]] | ||
| + | |||
| + | * You may need to repair the blade in your Wood Plane, so have a few extra Stone Blades made. | ||
| + | [[File:Repair_Wood_Plane.jpg|none|700px]] | ||
| + | |||
| + | * Buy Brick Rack Construction. | ||
| + | [[File:Brick_Rack_Construction.jpg|none|600px]] | ||
| + | |||
| + | * Use your Projects menu again. Go near a shoreline to build your Brick Rack since you will need to gather both Mud and Sand to make bricks. You might want to build more than 1 Brick Rack. | ||
| + | [[File:Brick_Rack.jpg|none|450px]] | ||
| + | * Gather enough Sand and Mud by standing on the Sand by a shoreline. The Sand and Mud icons need to show in the upper left corner of your screen. | ||
| + | [[File:Upper_Left_Icons.jpg|none|250px]] | ||
| + | [[File:Brick_Material_List.jpg|none|600px]] | ||
| + | [[File:Gather_Sand.jpg|none|350px]] | ||
| + | |||
| + | * Pick Grass by clicking on the Grass Icon in the upper left corner of your screen. You will need to move after picking grass each time for the Grass Icon to reappear. Then click yourself > Drop... > Grass. A pile of grass will appear next to you and will dry into yellowish colored Straw. The larger the pile of grass, the longer it will take to turn to Straw. | ||
| + | [[File:Grass_Icon.jpg|none|100px]] | ||
| + | [[File:Picking_Grass.jpg|none|200px]] | ||
| + | [[File:Drop_Grass.jpg|none|450px]] | ||
| + | <br> | ||
| + | |||
| + | {{L|en}} | ||
Latest revision as of 07:29, 20 December 2018
- If you have a Trial account, you have 24 game hours before having to buy a subscription. Trial accounts have limited privileges. To buy a subscription go to https://www.desert-nomad.com/
Starting Your Egyptian Journey
- You have landed on an island in the Mediterranean Sea! To give you a taste of life in Egypt your task is to learn skills and gather materials to build a ferry on this island's southern shore and launch to Egypt.
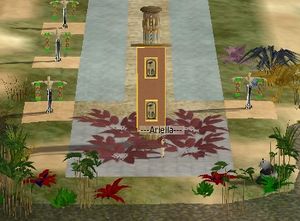
- The Welcome Banner is your starting place.
- A tutorial is at the top center of your screen or click the Notice Signs along the road.
- Click anywhere on the ground to move.
- Move your cursor to the left and right edge of the screen to look around.
- Move your cursor to the top or bottom of the screen to zoom.
- Click Self > Skip this Tutorial to get rid of the tutorial window.
- Click Self > Utility > Set my Time Zone.
- Self > Options > Interface Options > Camera to set how fast your view moves around.
- Self > OPtions > Camera to try out different camera views. F7 is the commonly used.
- Need to leave the game? Utility > Quit.
- Dress yourself differently. Click Self > Appearance.
- Bring up the World Map by hitting F3.
- Talk to other players on the island in the Welcoming Island chat tab.
Doing the List
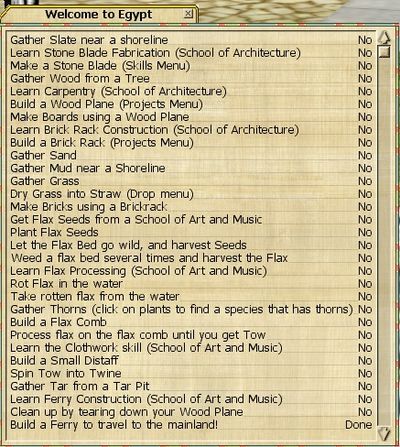
- Your to-do list, "Welcome to Egypt" tab is on the bottom left of your screen.
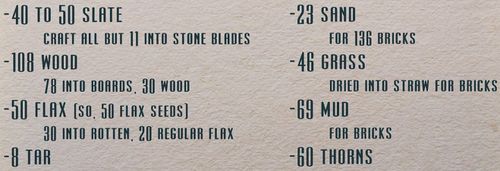
- Your shopping list:
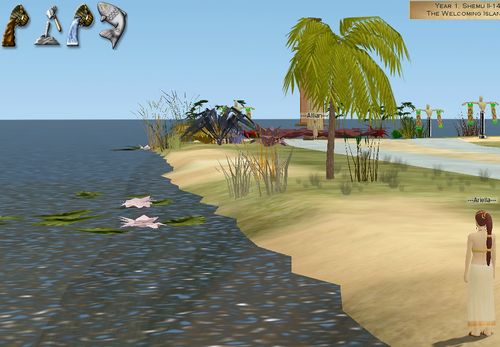
- Finding Slate. Run along a shoreline. Watch the icons in the upper left. Where you see a mud icon is where there is a chance for the slate icon to appear.
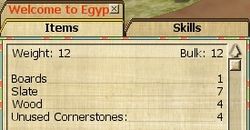
- The first time you gather a material, like slate, an Items tab shows up with your current Inventory. When you have gathered 4 slate, you get a bonus of 30 slate!
Buying Skills from School of Architecture
- Buy Stone Blade Fabrication at a School of Architecture. Now your Skills tab shows up!
- Forge a Stone Blade by clicking yourself then Skills... and pin the menu. You will need many so make more but leave 11 Slate in your Items. Look at your Skills tab to see that Stone Blade Fabrication started at Level 1 and will raise as you forge more stone blades up to a maximum of Level 7.
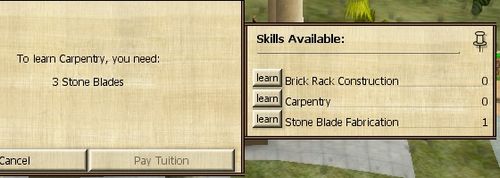
- Learn Carpentry then gather more slate.
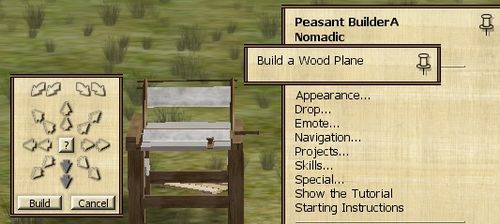
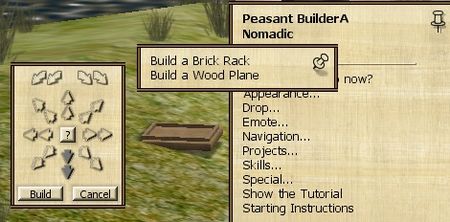
- Build a Wood Plane. You now have a Projects menu on yourself. The Build menu lets you move and rotate your machine before finishing the build. Make sure to click the Build to finish your new Wood Plane.
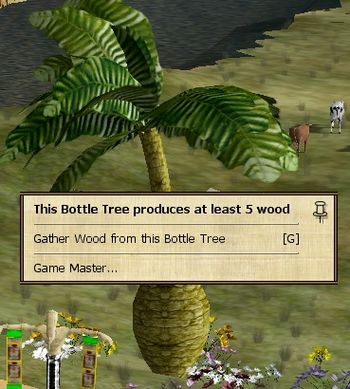
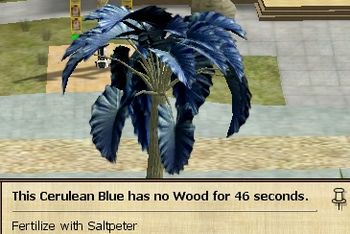
- Gather Wood. After you gather wood it takes a tree some time to regenerate more wood to gather.
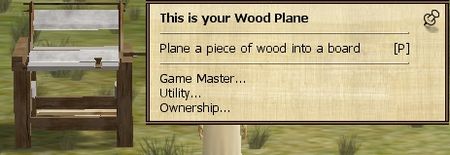
- Find your Wood Plane and make some Boards.
- You may need to repair the blade in your Wood Plane, so have a few extra Stone Blades made.
- Buy Brick Rack Construction.
- Use your Projects menu again. Go near a shoreline to build your Brick Rack since you will need to gather both Mud and Sand to make bricks. You might want to build more than 1 Brick Rack.
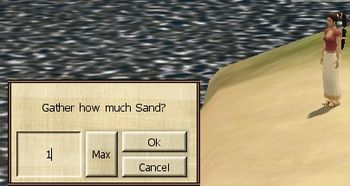
- Gather enough Sand and Mud by standing on the Sand by a shoreline. The Sand and Mud icons need to show in the upper left corner of your screen.
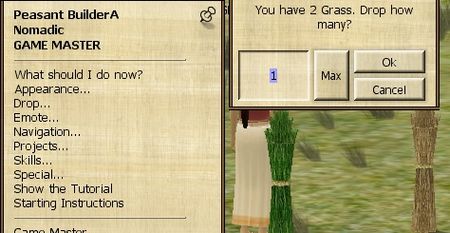
- Pick Grass by clicking on the Grass Icon in the upper left corner of your screen. You will need to move after picking grass each time for the Grass Icon to reappear. Then click yourself > Drop... > Grass. A pile of grass will appear next to you and will dry into yellowish colored Straw. The larger the pile of grass, the longer it will take to turn to Straw.
