The Wiki for Tale 8 is in read-only mode and is available for archival and reference purposes only. Please visit the current Tale 11 Wiki in the meantime.
If you have any issues with this Wiki, please post in #wiki-editing on Discord or contact Brad in-game.
Difference between revisions of "Camp Setup Guide"
Jump to navigation
Jump to search
| Line 4: | Line 4: | ||
* Build on a shore. | * Build on a shore. | ||
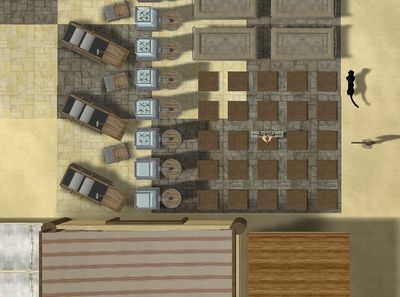
* Brick racks. (cannot be seen in above pic in lower right of compound next to camel pen) | * Brick racks. (cannot be seen in above pic in lower right of compound next to camel pen) | ||
| − | ** Stand in center of future 5 x 5 layout of brick racks on one corner of compound | + | ** Stand in center of future 5 x 5 layout of brick racks on one corner of compound '''WHERE YOU SEE BOTH SAND AND MUD ICONS'''. You can overload with sand/mud/straw and reach all racks. |
**Greenhouses are placed by camel pen for straw retrieval while standing in center of brick racks overloaded. | **Greenhouses are placed by camel pen for straw retrieval while standing in center of brick racks overloaded. | ||
[[File:Compound Layout 2 Forges Distaffs.jpg|500px]] | [[File:Compound Layout 2 Forges Distaffs.jpg|500px]] | ||
Revision as of 15:41, 27 January 2019
- Compound materials costs are calculated from distance away from initial door of compound.


- Build on a shore.
- Brick racks. (cannot be seen in above pic in lower right of compound next to camel pen)
- Stand in center of future 5 x 5 layout of brick racks on one corner of compound WHERE YOU SEE BOTH SAND AND MUD ICONS. You can overload with sand/mud/straw and reach all racks.
- Greenhouses are placed by camel pen for straw retrieval while standing in center of brick racks overloaded.
